
For the most part, I love my Google Products. Gmail is one of my favorite email providers. Did you know you can use Gmail to handle your domain email? You can have it land right in your Gmail inbox and reply using your domain email as well. All of instanticity.com email goes through my gmail box. Gmail allows you to have up to 5 POP email accounts. Setting up your domain email as a POP box is easy, just follow the steps below:
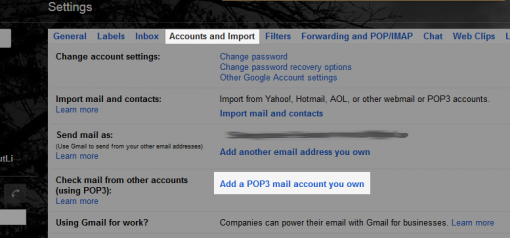
Go to your Settings and click on Accounts and Import and then look for Add a POP3 mail account you own.
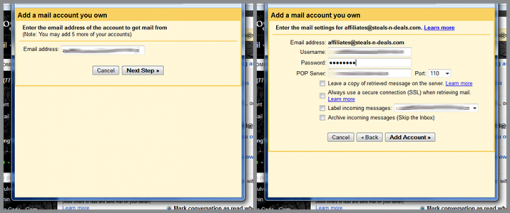
The pop up window will take you through a series of steps. The default settings will usually be just fine. First you’ll type in the email address you want to add [email protected]. In the next window, the user name will probably be just the you part, add the @yourdomain.com to that, most servers will require the full email address. You’ll also need to add your password. The rest of the settings here should work just fine. You can opt to label the incoming mail if you want so it stands out in your inbox.
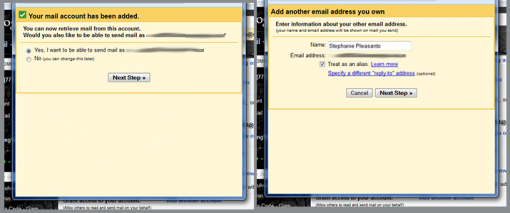
Now, your account has been added so that your emails will go to your Gmail inbox. The next few steps will allow you to send mail from your Gmail so it appears to come from your domain email. You won’t need to do anything except hit Next Step here and on the next screen. I do keep mine checked for Treat as Alias, you can read up on that and choose the setting that best suits you.
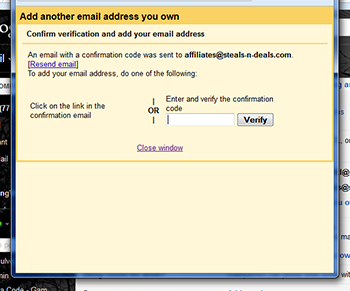
For SMTP server, listen to Google and just use Gmail. Click Next Step and then tell Google to send you the Verification. At this point, you’ll need to log in to your domain email account and get the code.
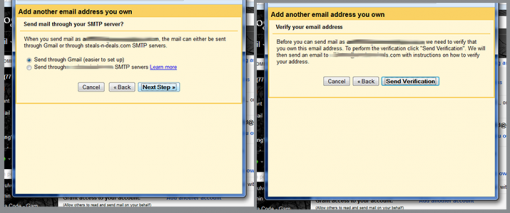
Pop the code in, click Verify and you are almost done.
One last step, back on the Settings -> Accounts and Imports page, look in the third section that says Send mail as: and click the radio option to “Reply from the same address the message was sent to”
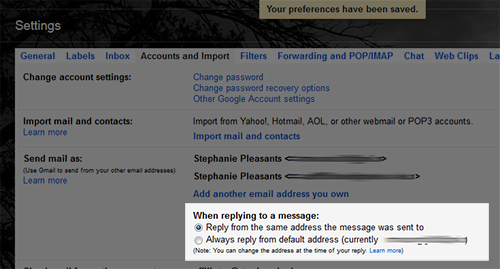
Remember, you can add up to 5 email addresses here. I have a live.com and a few domain emails going into my Gmail box. If you ever want to remove them, just go back to the settings page and click on delete.


